Mastering Corn on the Cob: Essential Knife Skills and Pro Tips
As summer is in full swing, so is the season for one of America's favorite side dishes: corn on the cob. Whether you're preparing for a backyard barbecue or a cozy family dinner, knowing how to handle corn with finesse can elevate your culinary game. In this guide, we'll explore the key knife techniques and expert advice to help you become a corn preparation expert.`
Choosing the Right Knife
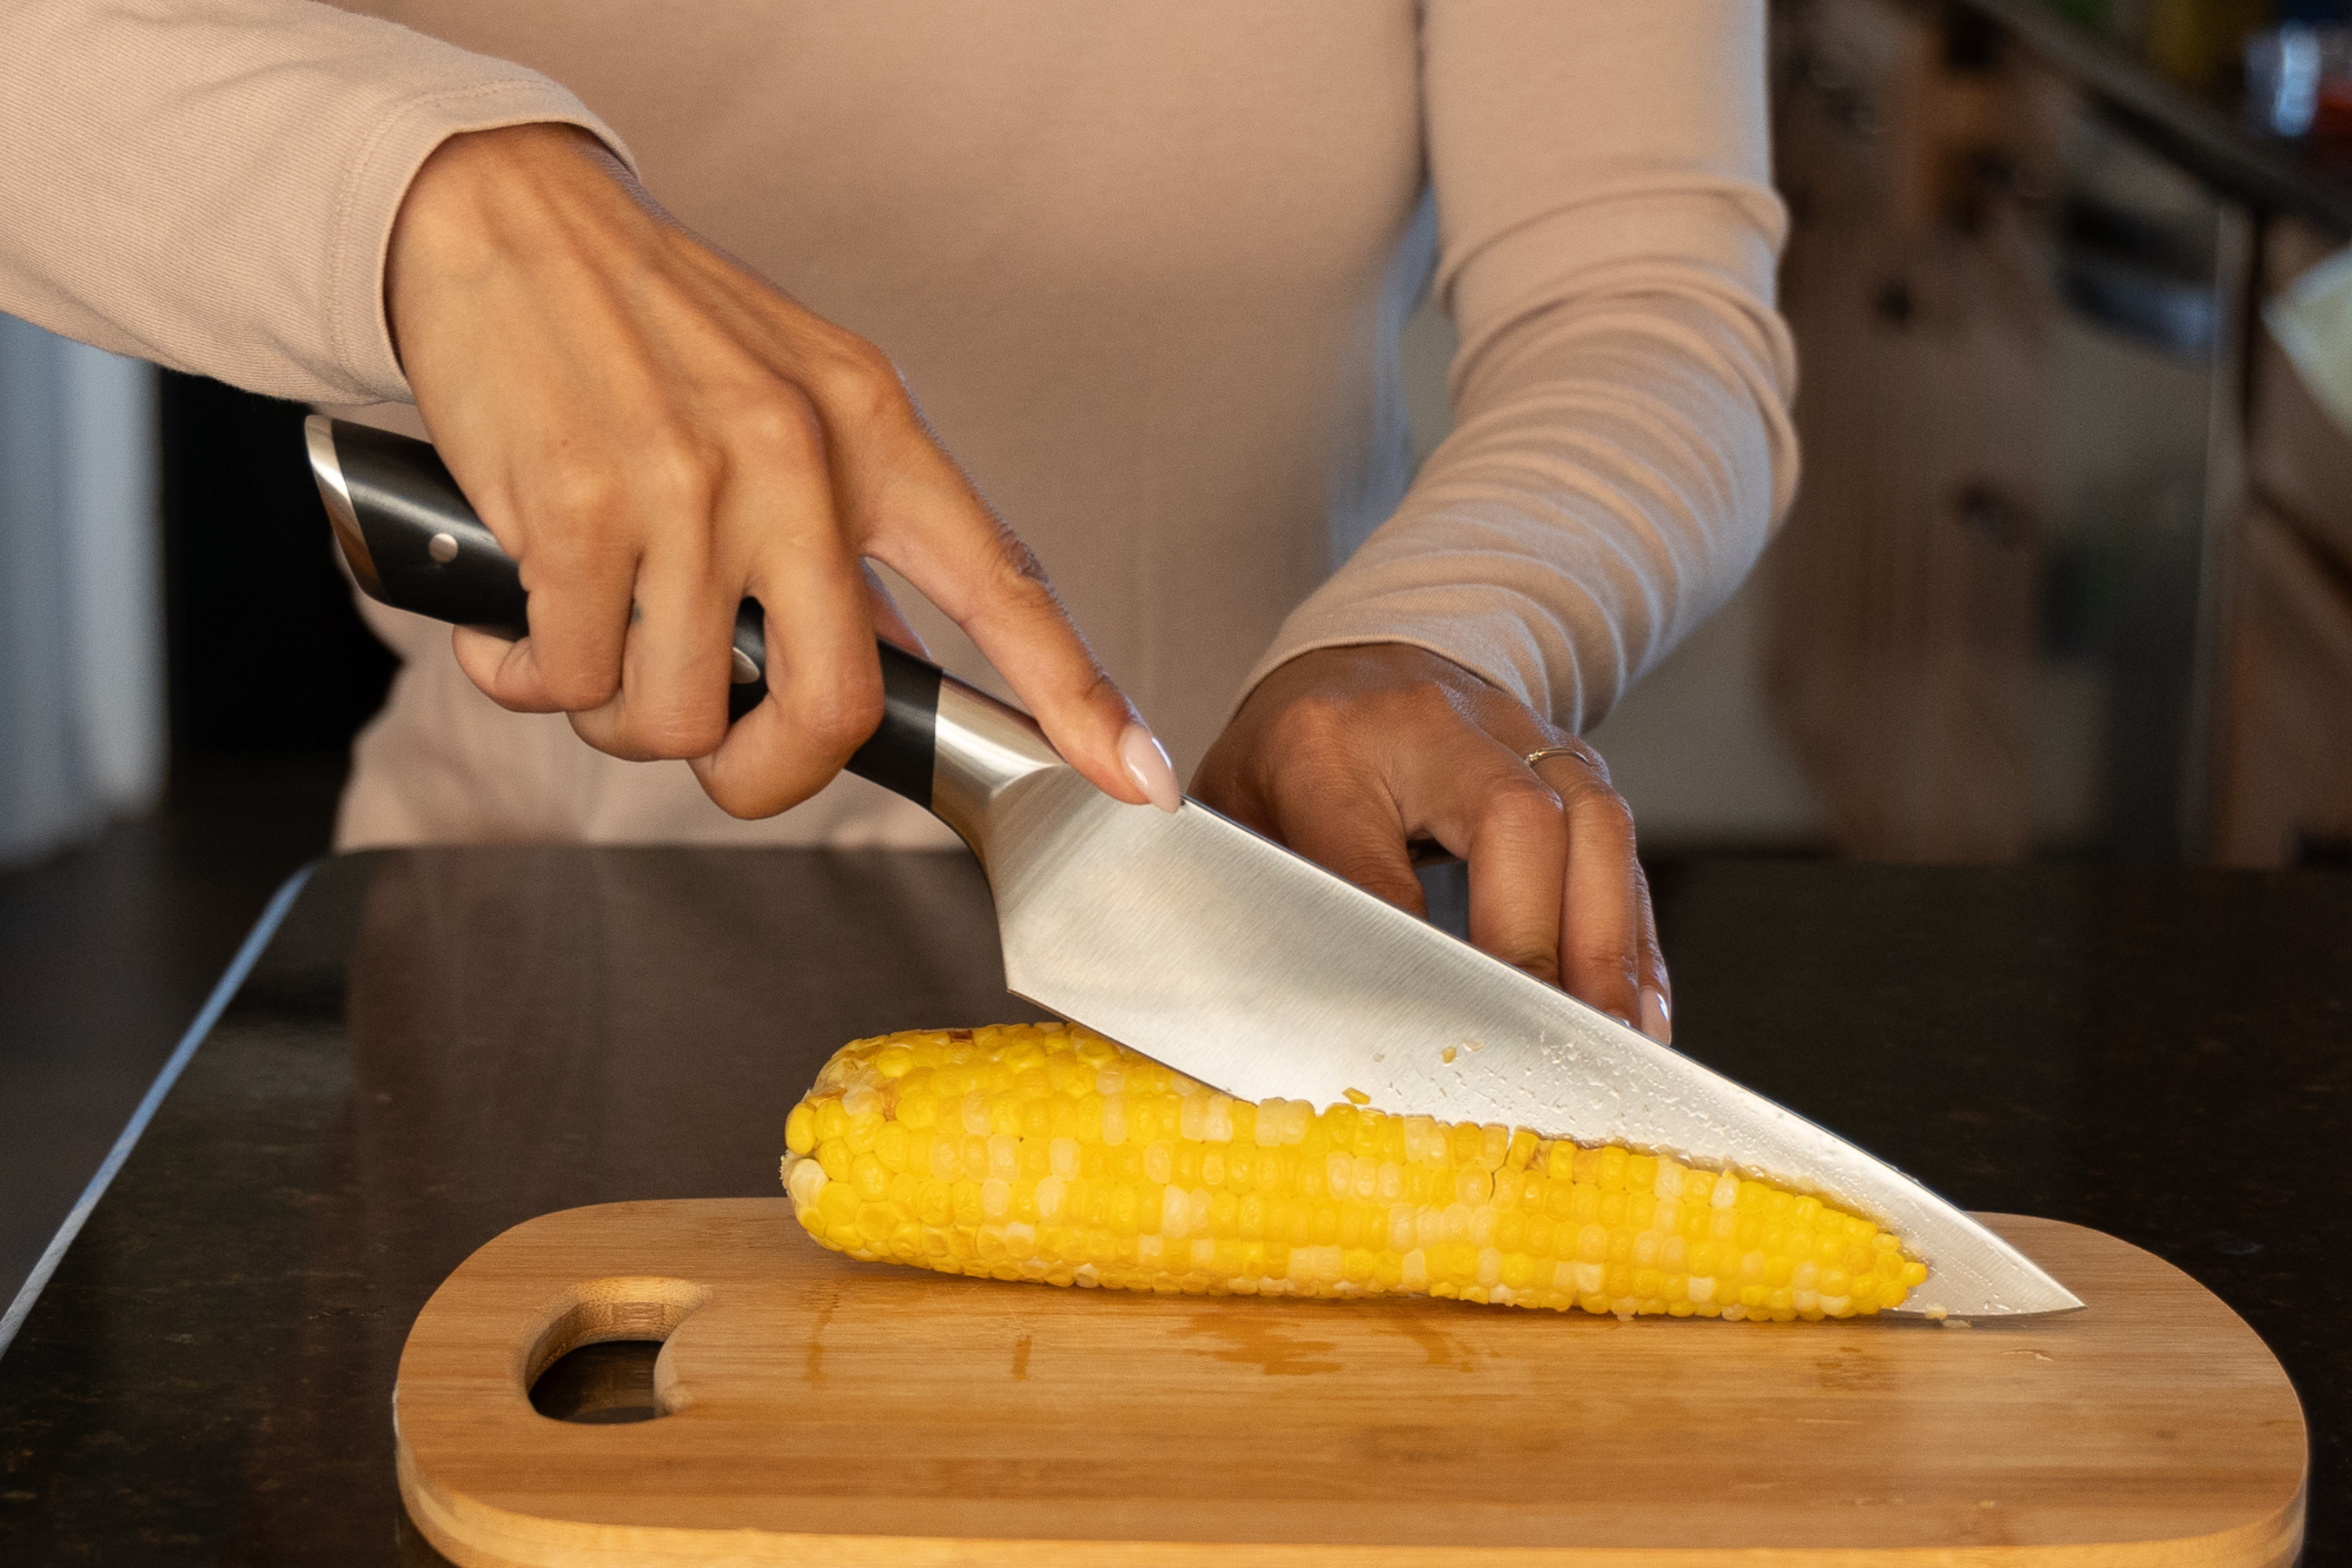
Before we start, let's talk tools. A sharp chef's knife is your best friend for corn preparation. Its broad blade and hefty weight make it perfect for efficient cutting. Avoid serrated knives, as they can tear the kernels rather than slice them cleanly.
The Microwave Trick - Click here to watch our video!
Before you start husking, try this time-saving trick:
- Place the unhusked corn in the microwave.
- Microwave for about 4 minutes per cob. For multiple cobs, add 4 minutes for each additional cob.
- Once done, use a kitchen towel or oven mitt to handle the hot corn.
- Cut off the stem end of the corn (about 1 inch from the base).
- Grip the top of the husk and gently shake and squeeze the cob. It should slide right out, leaving the husk and silk behind!
This method not only saves time but also makes removing the silk incredibly easy. The steam created inside the husk separates the silk from the kernels, resulting in a clean, silk-free cob.
Note: Be cautious when handling the corn after microwaving, as it will be very hot. Let it cool slightly before attempting to remove the cob from the husk. Click here to watch our video
Husking Like a Pro
If you prefer the traditional method:
- Grip the top of the corn firmly with one hand.
- Use your other hand to peel down the husks, starting from the top.
- Once most husks are removed, give the cob a good shake to loosen silk strands.
- Use a dry paper towel to rub off remaining silk.
Trimming the Base
Create a stable cutting surface by trimming off the stem end. This flat base will prevent the corn from rolling as you work.
Removing Kernels: Two Methods
Stand-Up Method:
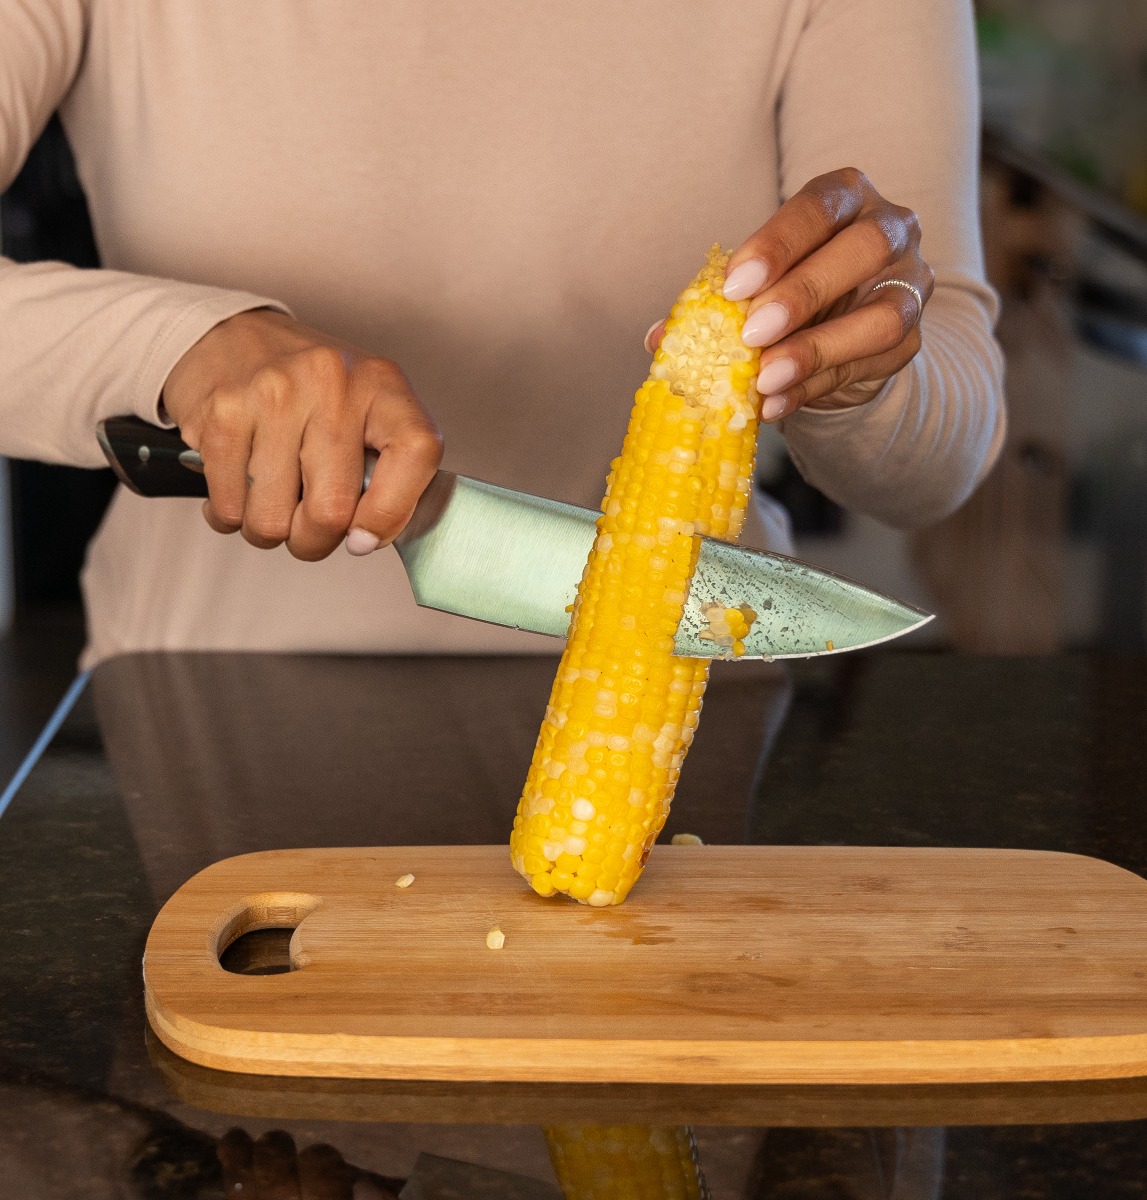
- Place the corn vertically on its flat end on your cutting board.
- Hold the top steady with your non-dominant hand.
- Using downward strokes, slice off the kernels, rotating the cob as you go.
Lay-Down Method:
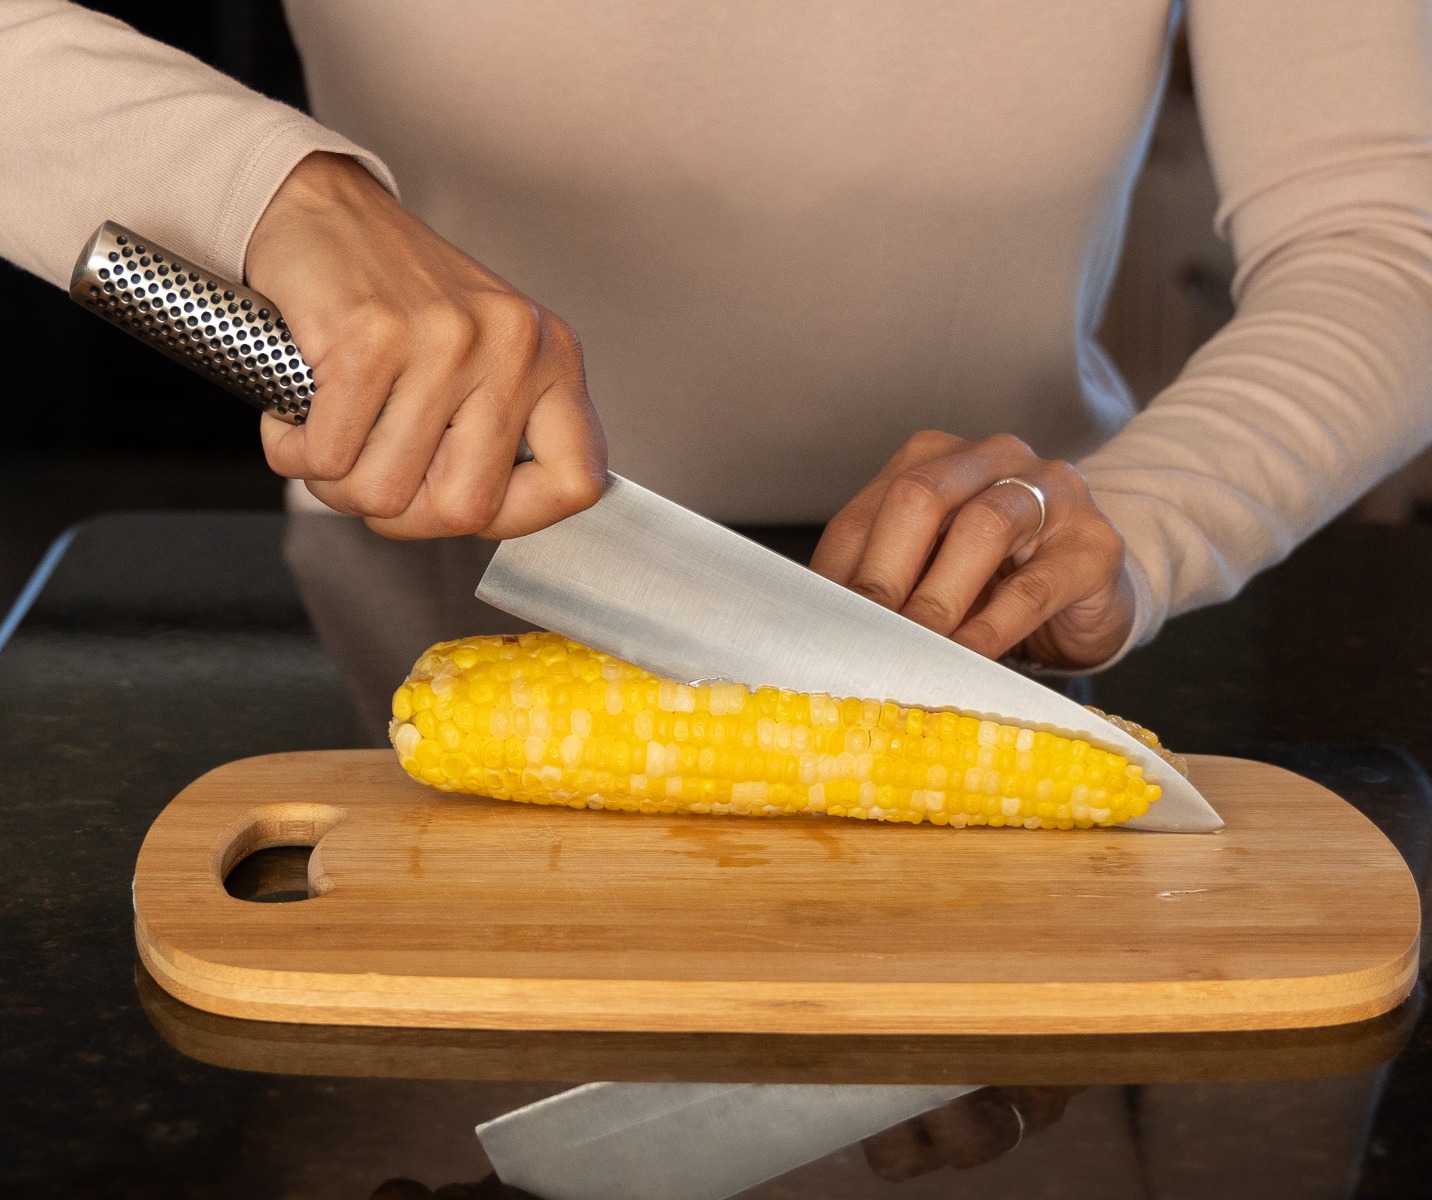
- Place the corn horizontally on your cutting board.
- Carefully slice off a strip of kernels.
- Rotate the cob and repeat until all kernels are removed.
Efficiency Tricks
- Place a small bowl upside down inside a larger bowl. Rest the corn on the small bowl while cutting. The kernels will fall neatly into the larger bowl.
- After removing kernels, use the back of your knife to scrape down the cob. This captures the flavorful "corn milk" left behind.
Advanced Techniques
For grilling enthusiasts, try these methods:
Corn "Planks":
- Cut the cob into 2-3 inch sections.
- Stand each section on its end and slice downward, creating a flat plank with kernels attached.
- These planks are perfect for even grilling and easy eating.
Grilling in Your Grill Pan:
- Preheat your Scanpan grill pan over medium-high heat.
- Brush the corn lightly with oil and season as desired.
- Place the corn in the pan, turning every 2-3 minutes until all sides are lightly charred and kernels are tender (about 10-12 minutes total).
- For added flavor, brush the corn with herb butter or your favorite seasoning during the last few minutes of cooking.
This method brings the outdoor grilling experience indoors, perfect for apartment dwellers or when the weather doesn't cooperate.
Common Mistakes to Avoid
- Don't use excessive force when cutting. Let the knife's sharpness do the work to avoid cutting into the cob.
- Rotate the corn frequently as you cut to ensure even kernel removal.
By mastering these techniques, you'll not only impress your guests but also streamline your corn preparation process. Remember, practice makes perfect, so don't be discouraged if your first attempts aren't flawless. With time, you'll be handling corn like a pro chef!
Happy cooking, and enjoy your perfectly prepared corn on the cob!